Unlock the Secret to Creamy Perfection: How to Make Whipped Butter at Home
There's a special kind of magic that happens when you take ordinary butter and transform it into a light, airy, and utterly spreadable delight. Whipped butter isn't just a fancy restaurant offering; it's an accessible luxury that elevates everyday meals and special occasions alike. Whether you're aiming for a rich, tangy, cultured butter reminiscent of European delicacies or a quick, flavored spread that melts effortlessly, learning
how to make whipped butter at home is a culinary skill that promises incredible rewards. Forget those hard, unyielding blocks of butter straight from the fridge; prepare to indulge in a silky, spreadable masterpiece.
What Makes Whipped Butter So Special?
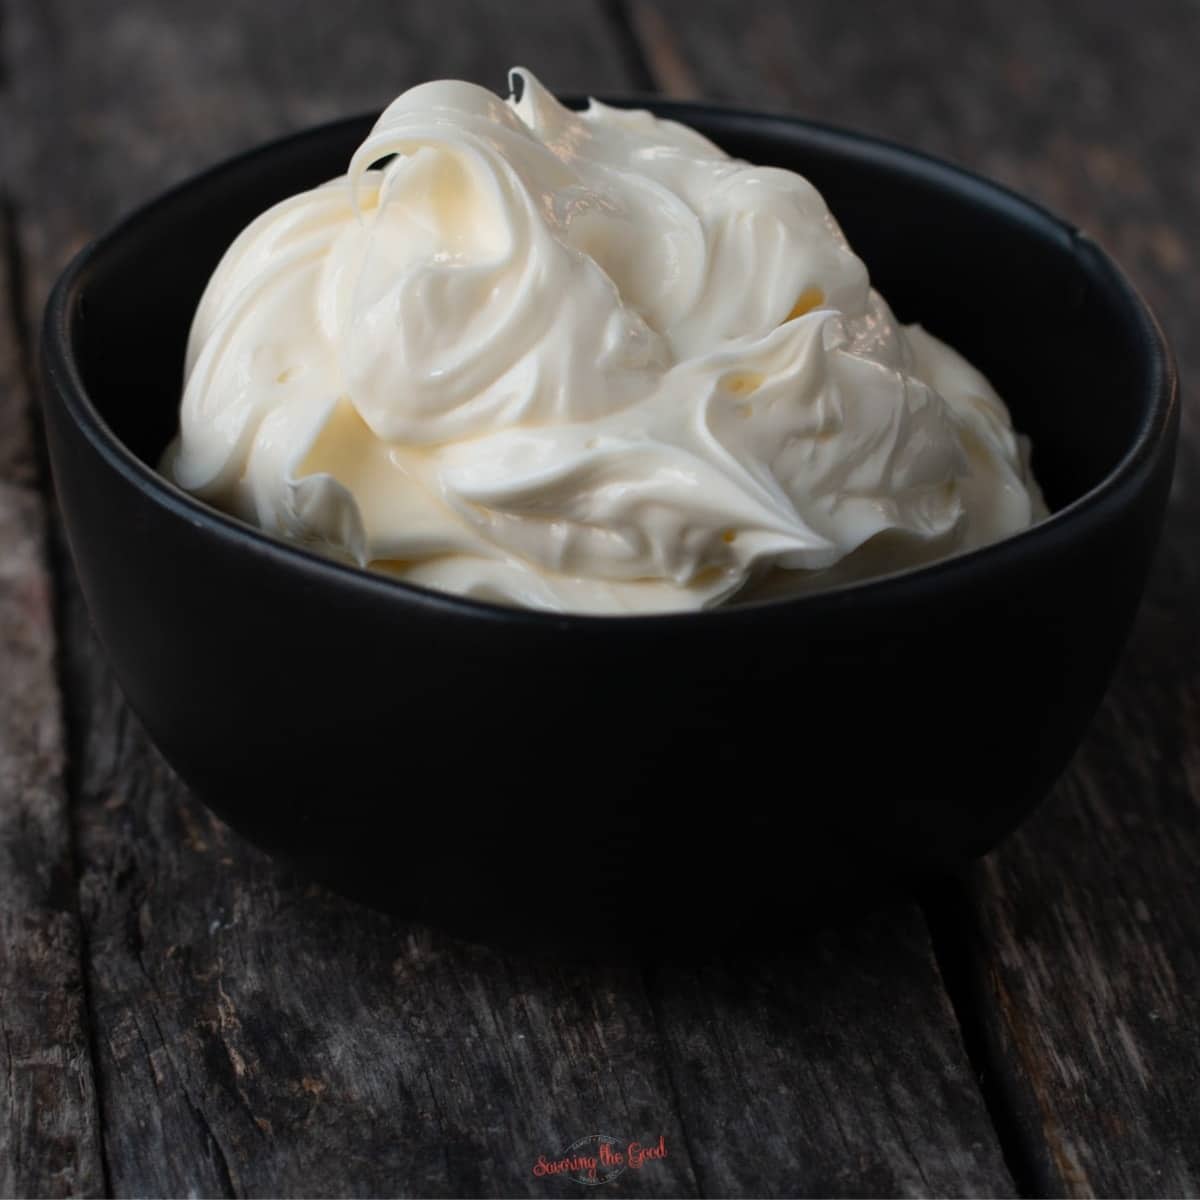
The allure of whipped butter lies primarily in its exquisite texture. By incorporating air into the butter, you create a product that is significantly lighter, fluffier, and far more spreadable than its unwhipped counterpart. This aeration also amplifies its flavor, allowing the nuances of the butter, whether plain or infused, to truly shine.
But it's not just about spreadability. Whipped butter offers several compelling benefits:
*
Enhanced Flavor: The process of whipping can subtly open up the butter's natural flavors, making it taste richer and more nuanced. When you add other ingredients, the flavors meld more seamlessly.
*
Effortless Spreading: Say goodbye to tearing your toast or struggling with cold butter on a warm scone. Whipped butter glides on smoothly, making every bite a pleasure.
*
Versatility: From savory herb-infused concoctions perfect for steak or roasted vegetables to sweet blends ideal for pancakes, muffins, or even a simple baguette, the possibilities are endless.
*
Cost-Effective Customization: While gourmet whipped butters can be pricey, making your own allows you to control ingredients and flavors, often at a fraction of the cost.
Understanding these benefits is the first step in appreciating the journey of learning
how to make whipped butter, and we're about to explore two distinct, yet equally rewarding, paths to achieving it.
Method 1: Crafting Cultured Whipped Butter from Scratch (French-Style)
For those seeking the pinnacle of butter craftsmanship, making cultured whipped butter from scratch is an incredibly rewarding experience. This method not only results in a naturally airy butter but also imbues it with a distinctive, slightly tangy flavor and a luxurious creaminess often associated with high-quality European butter. It's a journey from cream to golden goodness, embracing a touch of patience for an incomparable result.
The secret to this "French-style" butter lies in the fermentation process. Unlike standard butter, which is made from sweet cream, cultured butter starts with cream that has been allowed to ferment with beneficial bacteria, much like yogurt or sourdough. This process deepens the flavor and contributes to its unique aroma and texture.
Ingredients You'll Need:
* High-quality heavy cream (36-40% fat content is ideal)
* Cultured buttermilk (ensure it states 'cultured' on the label)
* Plain, cultured yogurt (again, look for 'cultured')
* Salt (optional, to taste)
* Ice water (for washing the butter)
The Process:
1.
Prepare the Cultured Cream: In a clean bowl, combine 4 cups of high-fat heavy cream with 4 tablespoons of cultured buttermilk and 1 cup of plain, cultured yogurt. Mix gently but thoroughly.
2.
Fermentation: Cover the bowl loosely with a clean cloth or lid and let it sit at room temperature (ideally 68-72°F / 20-22°C) for 24-48 hours. During this time, the cultures will ferment the cream, thickening it and developing complex flavors. You'll notice a slightly tangy aroma and a thicker consistency.
3.
Chill Thoroughly: After fermentation, transfer the cultured cream mixture to the refrigerator and chill for at least 2-3 hours. Crucially, also chill the bowl and whisk attachments you intend to use for whipping. Cold temperatures are vital for butterfat separation.
4.
Whipping and Churning: Remove the chilled cream mixture, bowl, and whisk from the refrigerator. Using a stand mixer with a whisk attachment, or a hand mixer, begin whipping the cream on a low speed, gradually increasing to medium-high. The mixture will go through several stages:
*
Soft Peaks: Like regular whipped cream.
*
Stiff Peaks: Very firm whipped cream.
*
Grainy & Lumpy: The fat molecules start clumping together.
*
Separation: Suddenly, the mixture will "break," separating into solid butterfat and a milky liquid (buttermilk). This is the magical moment when butter is formed! Keep whipping for another minute or two until the butter solidifies further.
5.
Washing the Butter: This is a critical step for longevity and purity. Drain the liquid buttermilk (save it for baking!). Place the solid butter into a bowl of ice water. Using a spatula or your clean hands, knead and press the butter under the water. The goal is to squeeze out any remaining buttermilk, which can cause the butter to spoil quickly. Change the ice water frequently until it runs clear. This process typically takes 3-5 changes of water.
6.
Season and Shape: Once fully washed, remove the butter from the water and press out any excess moisture. At this stage, you can knead in salt to taste (approximately 1/2 to 1 teaspoon per cup of butter). Form it into a log or press it into a mold.
This cultured whipped butter is a testament to patience and offers a truly unique taste and naturally airy texture. For more advanced techniques or troubleshooting, you might find valuable insights in
how to make whipped butter - Article 2.
Method 2: Elevating Store-Bought Butter into Flavored Whipped Delight
If you're looking for a quicker, equally delicious way to master
how to make whipped butter, transforming store-bought butter is your go-to method. This approach allows for endless creativity with flavor infusions, making it perfect for custom spreads. It’s the secret behind those incredible honey-cinnamon butters you find at steakhouses!
Ingredients You'll Need:
* 1 cup (2 sticks) high-quality salted or unsalted butter (depending on your preference and additions)
* Flavorings of your choice:
* Sweet: 2 tablespoons honey, 1 teaspoon ground cinnamon, 2 tablespoons powdered sugar (as per the reference)
* Savory: 1-2 cloves minced garlic, 1 tablespoon fresh chopped herbs (rosemary, thyme, parsley), a pinch of black pepper, or citrus zest.
The Quick Process:
1.
Soften the Butter: This is key! Leave your butter out at room temperature for at least 1-2 hours, or until it's very soft but not melted. If you're in a hurry, you can gently microwave it for 10-15 second bursts, flipping it between bursts, until soft.
2.
Whip the Butter: Place the softened butter into a large mixing bowl. Using a stand mixer with a paddle attachment or a hand mixer, whip the butter on medium-high speed for 3-5 minutes. You want to see a noticeable change: the butter will become lighter in color, increase in volume, and achieve a smooth, creamy, almost fluffy consistency. This is where the magic of aeration happens!
3.
Add Flavorings: Once the butter is light and fluffy, scrape down the sides of the bowl. Add your desired flavorings. If using honey, cinnamon, and powdered sugar, add them all now.
4.
Whip Again: Continue to whip on medium-high speed for another 2-3 minutes, ensuring all the added ingredients are thoroughly incorporated and the butter maintains its light, airy texture. Taste and adjust seasonings as needed.
This method is incredibly adaptable. Imagine a roasted garlic and rosemary whipped butter for crusty bread, or a vibrant lemon-dill whipped butter for grilled fish. The possibilities truly are endless, giving you complete control over your culinary creations.
Storing and Serving Your Homemade Whipped Butter
Regardless of which method you choose for
how to make whipped butter, proper storage is crucial to maintain its freshness and quality.
*
Storage: Store your homemade whipped butter in an airtight container in the refrigerator. Cultured butter (Method 1) typically lasts for 2-3 weeks, similar to commercial butter. Flavored whipped butter (Method 2) should also be refrigerated and is best consumed within 1-2 weeks, especially if fresh ingredients like herbs or garlic are used.
*
Serving: For the best experience, allow your whipped butter to come to room temperature for 10-15 minutes before serving to ensure optimal spreadability.
Whipped butter shines in countless applications:
* Slather it on warm toast, bagels, or muffins.
* Serve it alongside pancakes, waffles, or French toast.
* Use savory variations to finish grilled steaks, roasted chicken, or steamed vegetables.
* Pipe it onto corn on the cob for an elegant touch.
* It's perfect for entertaining, offering a gourmet touch to your bread basket.
Embrace the Art of Whipped Butter
Learning
how to make whipped butter at home is more than just a recipe; it's an invitation to elevate your everyday meals and discover a new dimension of flavor and texture. Whether you embark on the rewarding journey of crafting cultured butter from scratch or opt for the quick and creative path of flavoring store-bought butter, the result is a product that is undeniably superior. So, gather your ingredients, fire up your mixer, and prepare to indulge in the creamy, dreamy perfection of homemade whipped butter. Your taste buds, and your toast, will thank you! For even more creative ideas and variations, don't miss
how to make whipped butter - Article 3.